Consistent sizing can make a big difference in legibility!
When kids start to write, they struggle in many areas. They often write letters in reversal, don’t follow the three-lined format we usually use, start letters at the wrong start spot, and many more! Today’s Motor Monday is all about size awareness of letters in handwriting.
One of the common problems we encounter when our kids are beginning to develop their handwriting is their spatial awareness, and they tend to write letters too large when given blank paper.
Different sizes of letters make handwriting appear sloppy, but that’s just the start. Many things need to be considered when aiming for legibility. Refining letter sizing is an excellent point to focus on while kids develop (and we progress monitor) their skill. We’ve got this! I have evidence-based activities and recommendations to share with you.

Letter sizing refers to understanding that there are big and small letters as well as sizing letters consistently.
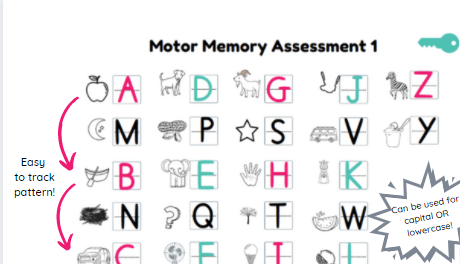
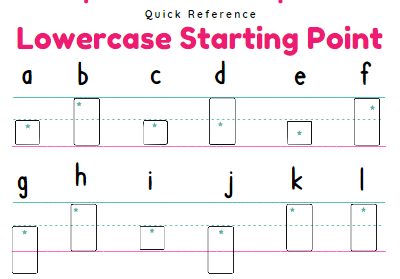
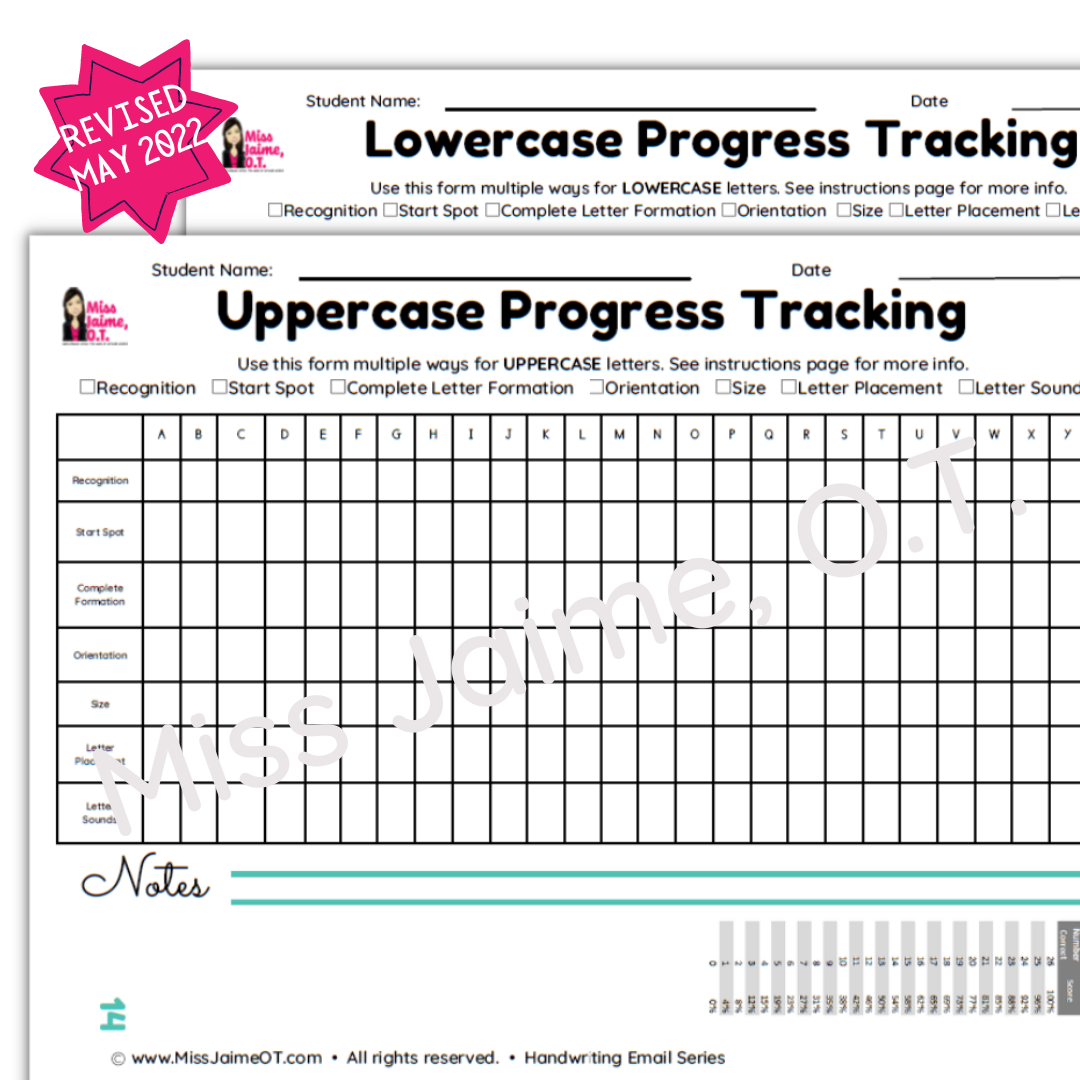
Letter Size is easy to assess and monitor. Just set your goal size! Many handwriting programs use 3/4″ for tall letters, but if your program uses a different size, or if you have older kids you are working with, YOU decide what is appropriate. Use my free letter assessments that you can get at https://www.MissJaimeOT.com/HW101
Watch my video for more insights and an overview of how you can assess your kid’s letter sizing.
Check it out below!
")
How to Teach Letter Sizing
1 . Use individual boxes for each letter. Kids tend to use all the spaces on blank paper. This tip will help them use only the area in the box and practice consistent sizing of letters.
2. Cut a rectangular window strip on cardboard or a folder to provide a visual guide to the kid when writing their letters. This window strip will be a guide that contains letter sizes.
3. Teach tall, small, and fall letters. Kids’ awareness of the differences between letters will help them assess the appropriate lines to use.
4. Teach kids the top, middle, and bottom lines by using colored lines.
5. Use WooTape to support the kids’ writing in a consistent line, it will help them practice to write in a linear position with all the letters combined. Check this post about 6 Ways to Use Wootape at Home & in the Classroom.
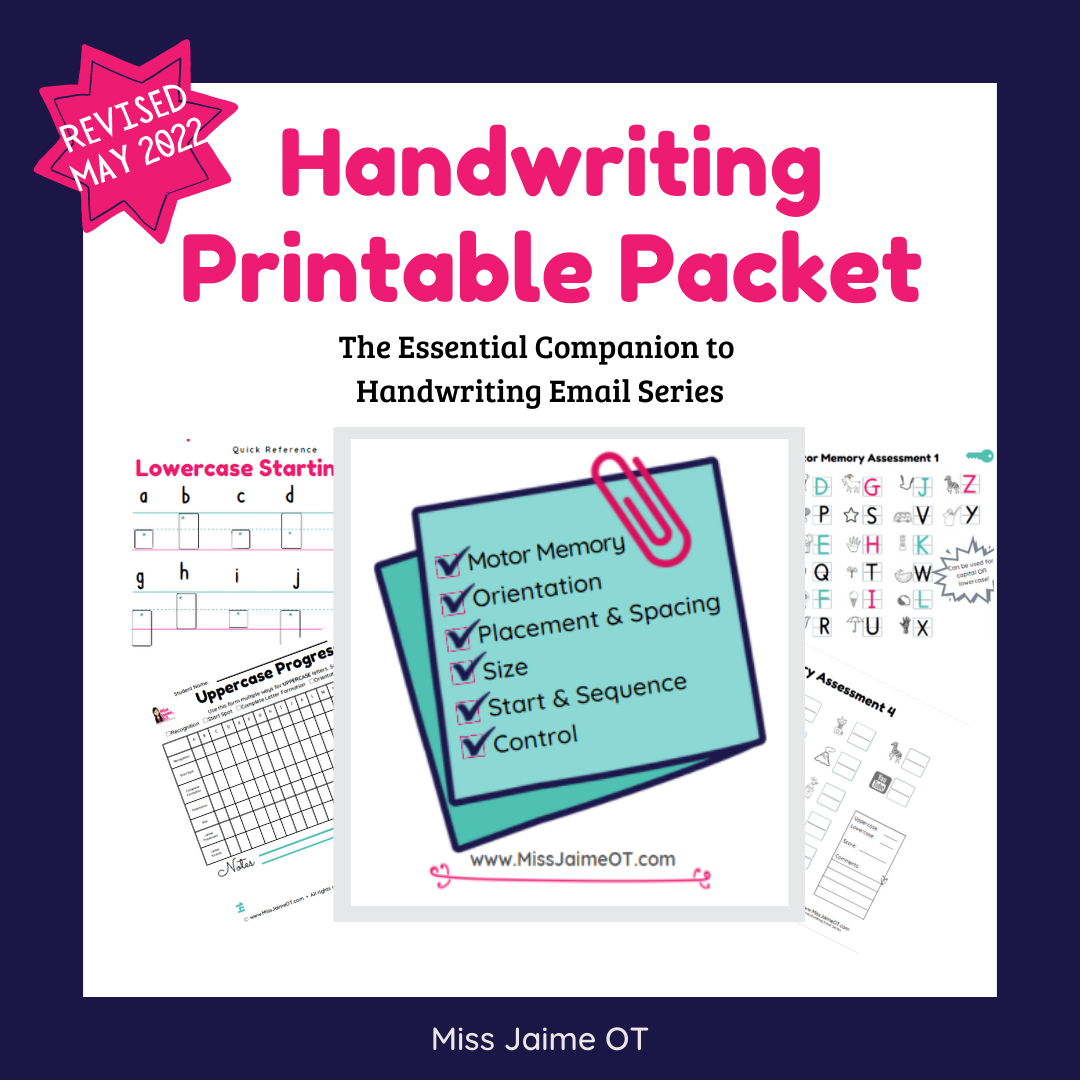
Don’t forget to get your Handwriting Printable Packet below. It’s in my Shop for $4.99, but if you sign up for my Handwriting 101 email course, you can get it for FREE! This free handwriting email series will offer you more tips and tricks to teach Letter Placement, in addition to Motor Memory, Letter Recognition, Sizing, Orientation, and Complete Letter Formation. You can sign up here: www.missjaimeot.com/HW101


$4.99
$49.99